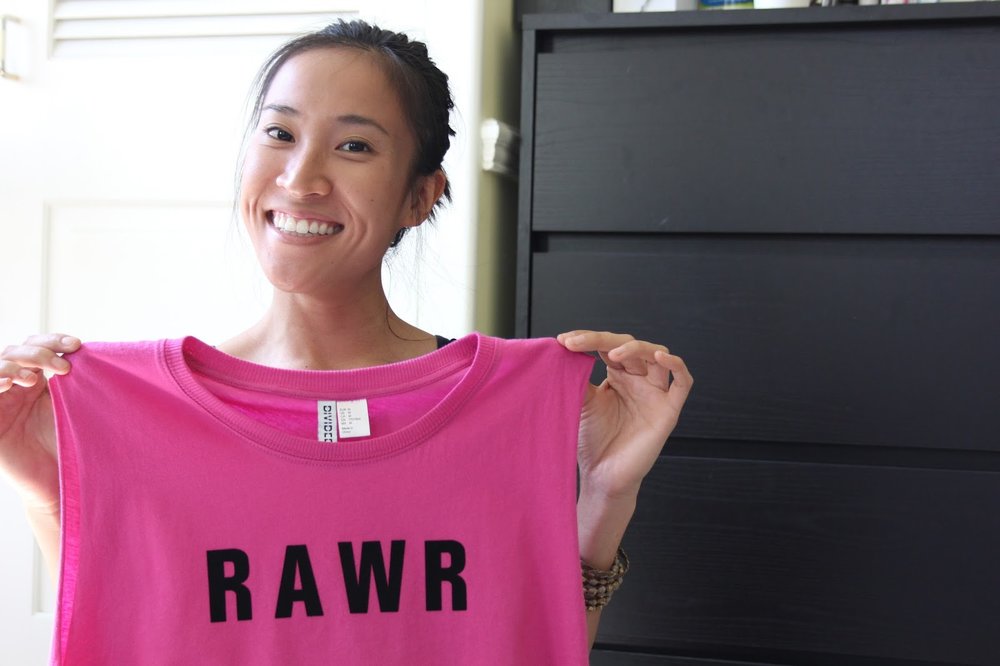
DIY | Graphic Word T-Shirt & Sweashirt
DIY Project Details:
Total Cost- $20
Total Time- 45 minutes to complete 2 tops with 3 lines of text
Difficulty- ❤❤♡♡♡
The majority of the time was spent on lining up letters and making sure they were spaced and aligned on the surface, so just take a little bit of patience.

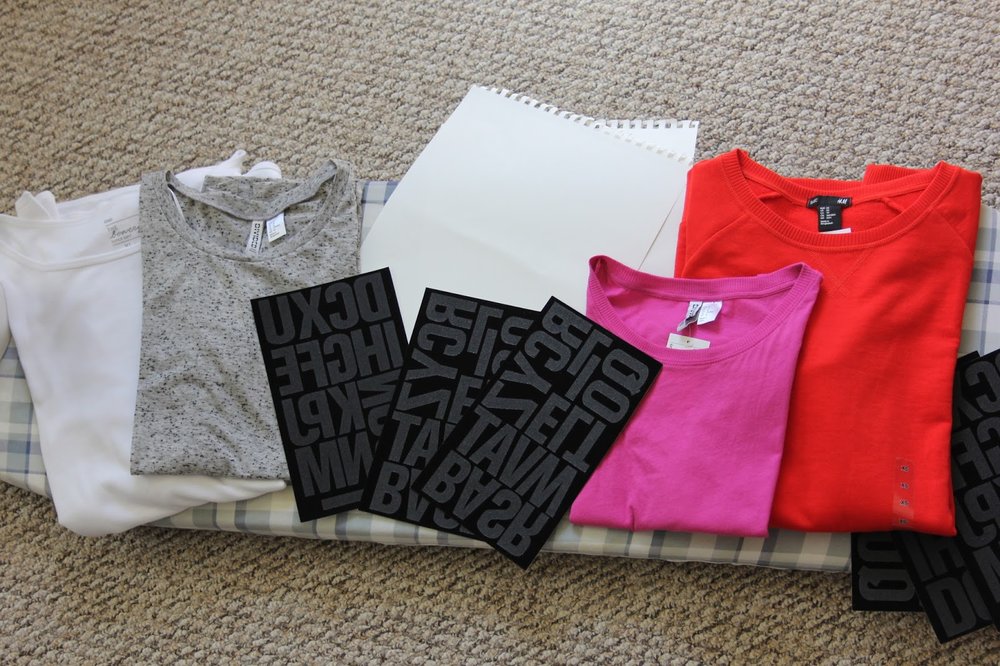
♡Inspiration Photos Blank T-Shirt, Tank or Sweatshirt
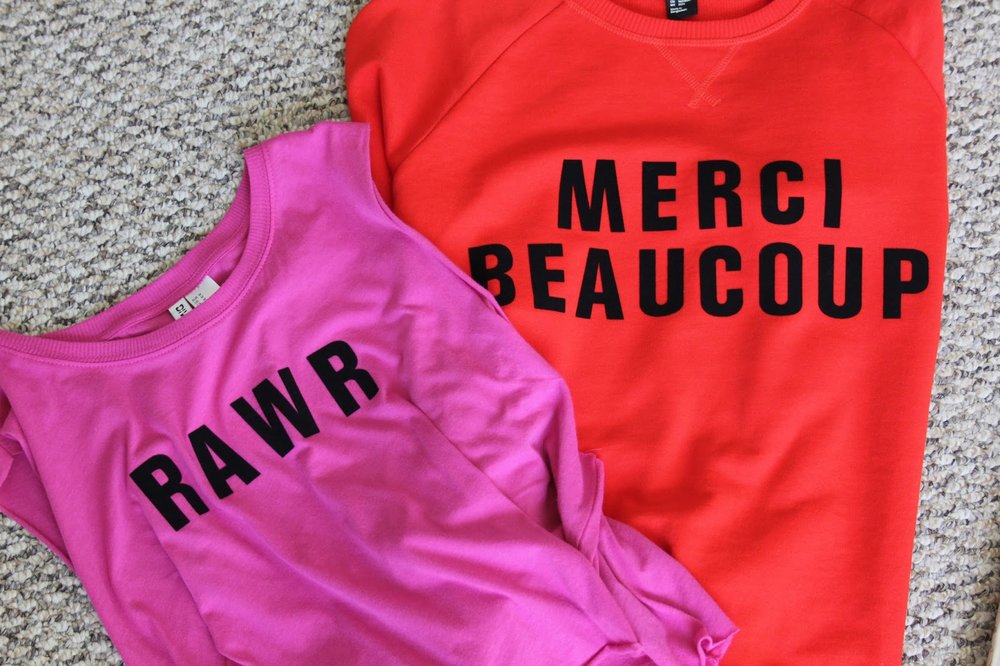
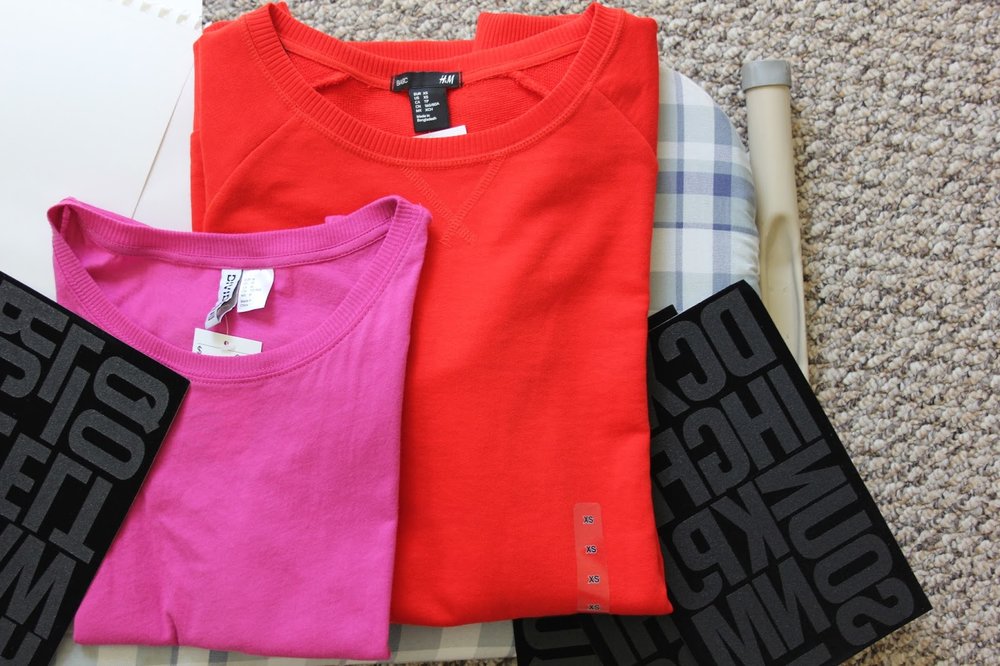
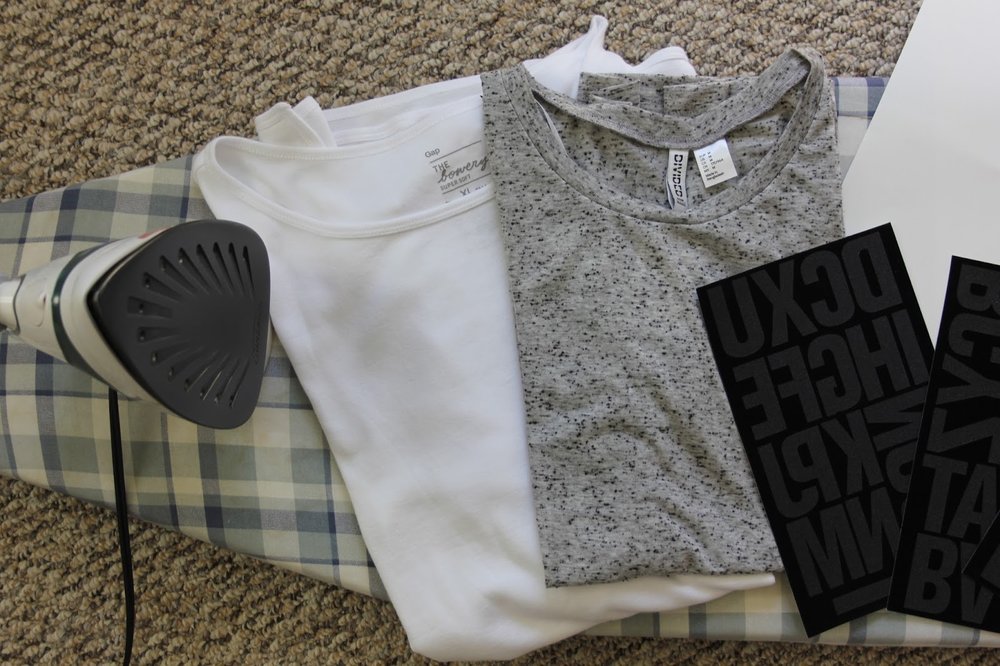
♡ Blank T-Shirt, Sweatshirt or any other top you want to use (I got my top & sweatshirt from H&M; preferably cotton, the iron on letters do not adhere well to synthetic fibers-you may need to pre-wash top depending on fabric)
♡Iron-On Letters ($3.99 Packs from Ebay): Use black letters for light colored fabrics and white letters for dark fabrics
♡Iron
♡Ironing Board
♡Card stock or Cardboard
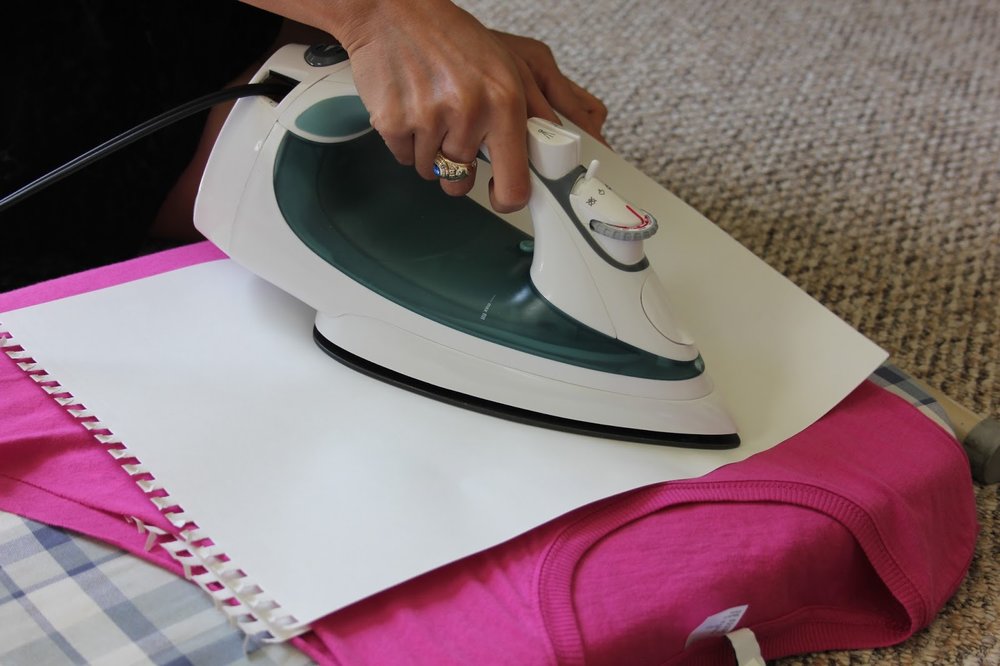
♡Parchment paper or paper that can withstand high heat (I used a thicker paper since we didn't have parchment paper, and just made sure to not leave the iron on it for a prolonged period of time)

♡Turn Iron onto the Wool Setting
♡Place the cardboard piece or paper inside the t-shirt or sweatshirt your using, then place it front-side up on the ironing board, smooth out wrinkles.
♡ Open the iron-on letter pack; if the iron-on letters come with instructions, it may instruct you to cut out the letters one by one, but I felt like it would be hard to line up the letters since you wouldn't be able to visibly see them when placing on the surface; so I peeled and placed each one to spell out words. If you decide to cut out the letters, you won't need parchment paper to iron on top of.
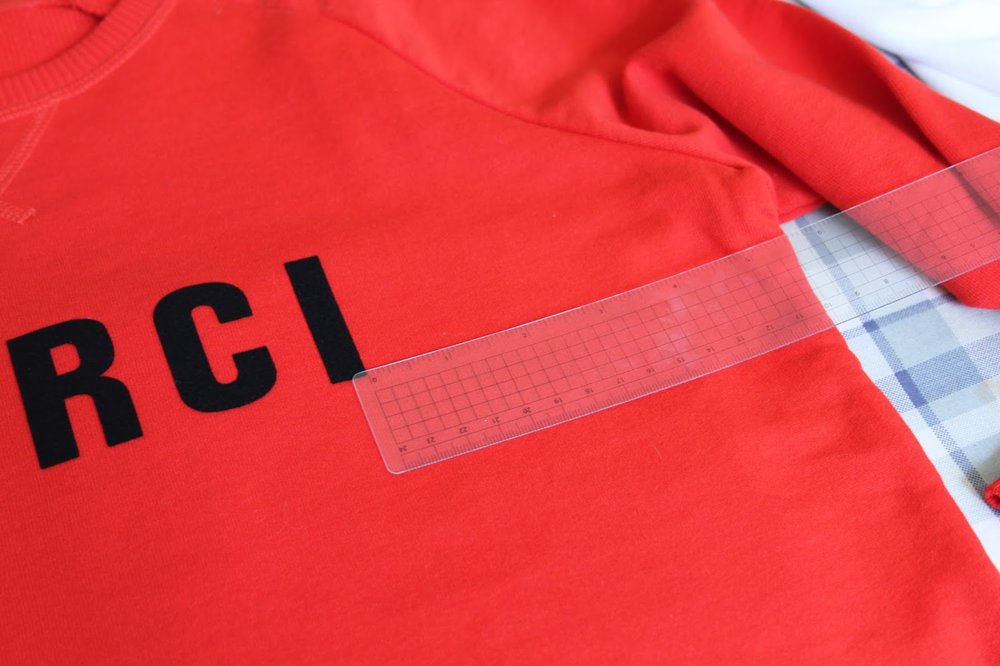
♡After placing the letters down, I measured from the side seams to the beginning and end of the word. For example, for the word 'MERCI', I measured from the left side seam to the beginning of the letter 'M', then measured from the right side seam to the end of the letter 'I'. I then adjusted the letter placement so that the distance from the beginning and last letters were even.
♡After measuring and adjusting the sides, I measured from the top of each letter to the neckline or top seam to attempt to make the word aligned. When adding the word 'BEAUCOUP' under 'MERCI' I measured in between the two words and readjusted so that the space was even.
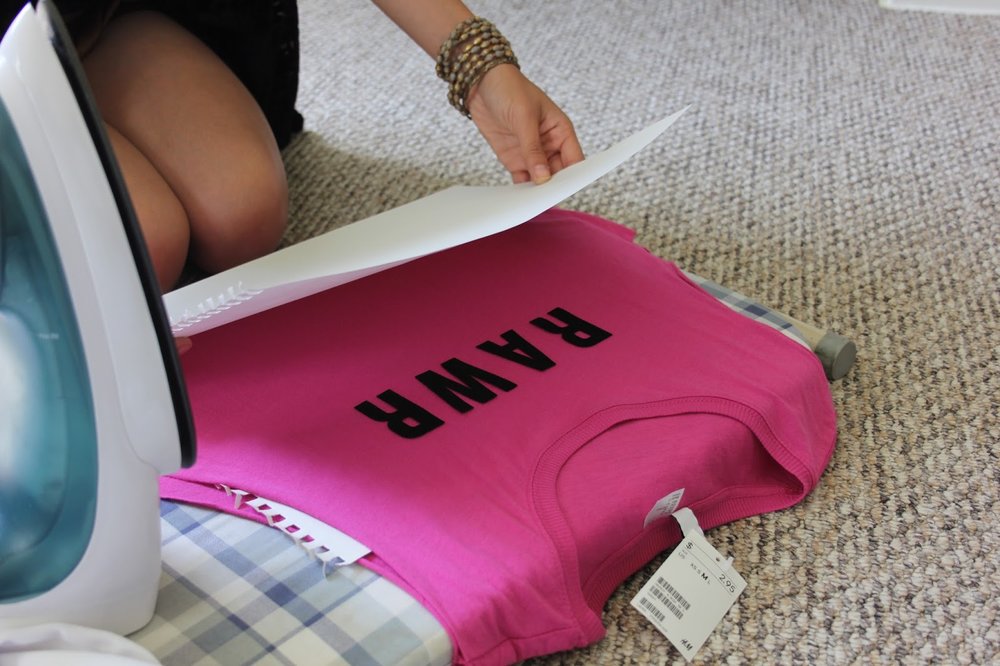
♡Start to iron on top of the parchment paper, holding the iron on top of each letter 15-20 seconds, keep your hand on the iron and do not leave the iron sitting on top of the paper.
♡I checked to see if the letter adhered by slightly pulling up on the corner of one letter to see if it would lift. If it started to lift then I went back and ironed.
♡Once you've finished the front, removed the parchment paper, flip your t-shirt or sweatshirt over so that the back side is facing up, place the parchment paper on the back side wear the letters are placed and iron the back. You can iron for 10-15 seconds per letter.