DIY Press Flowers on Taper Candles - Candlesticks Project
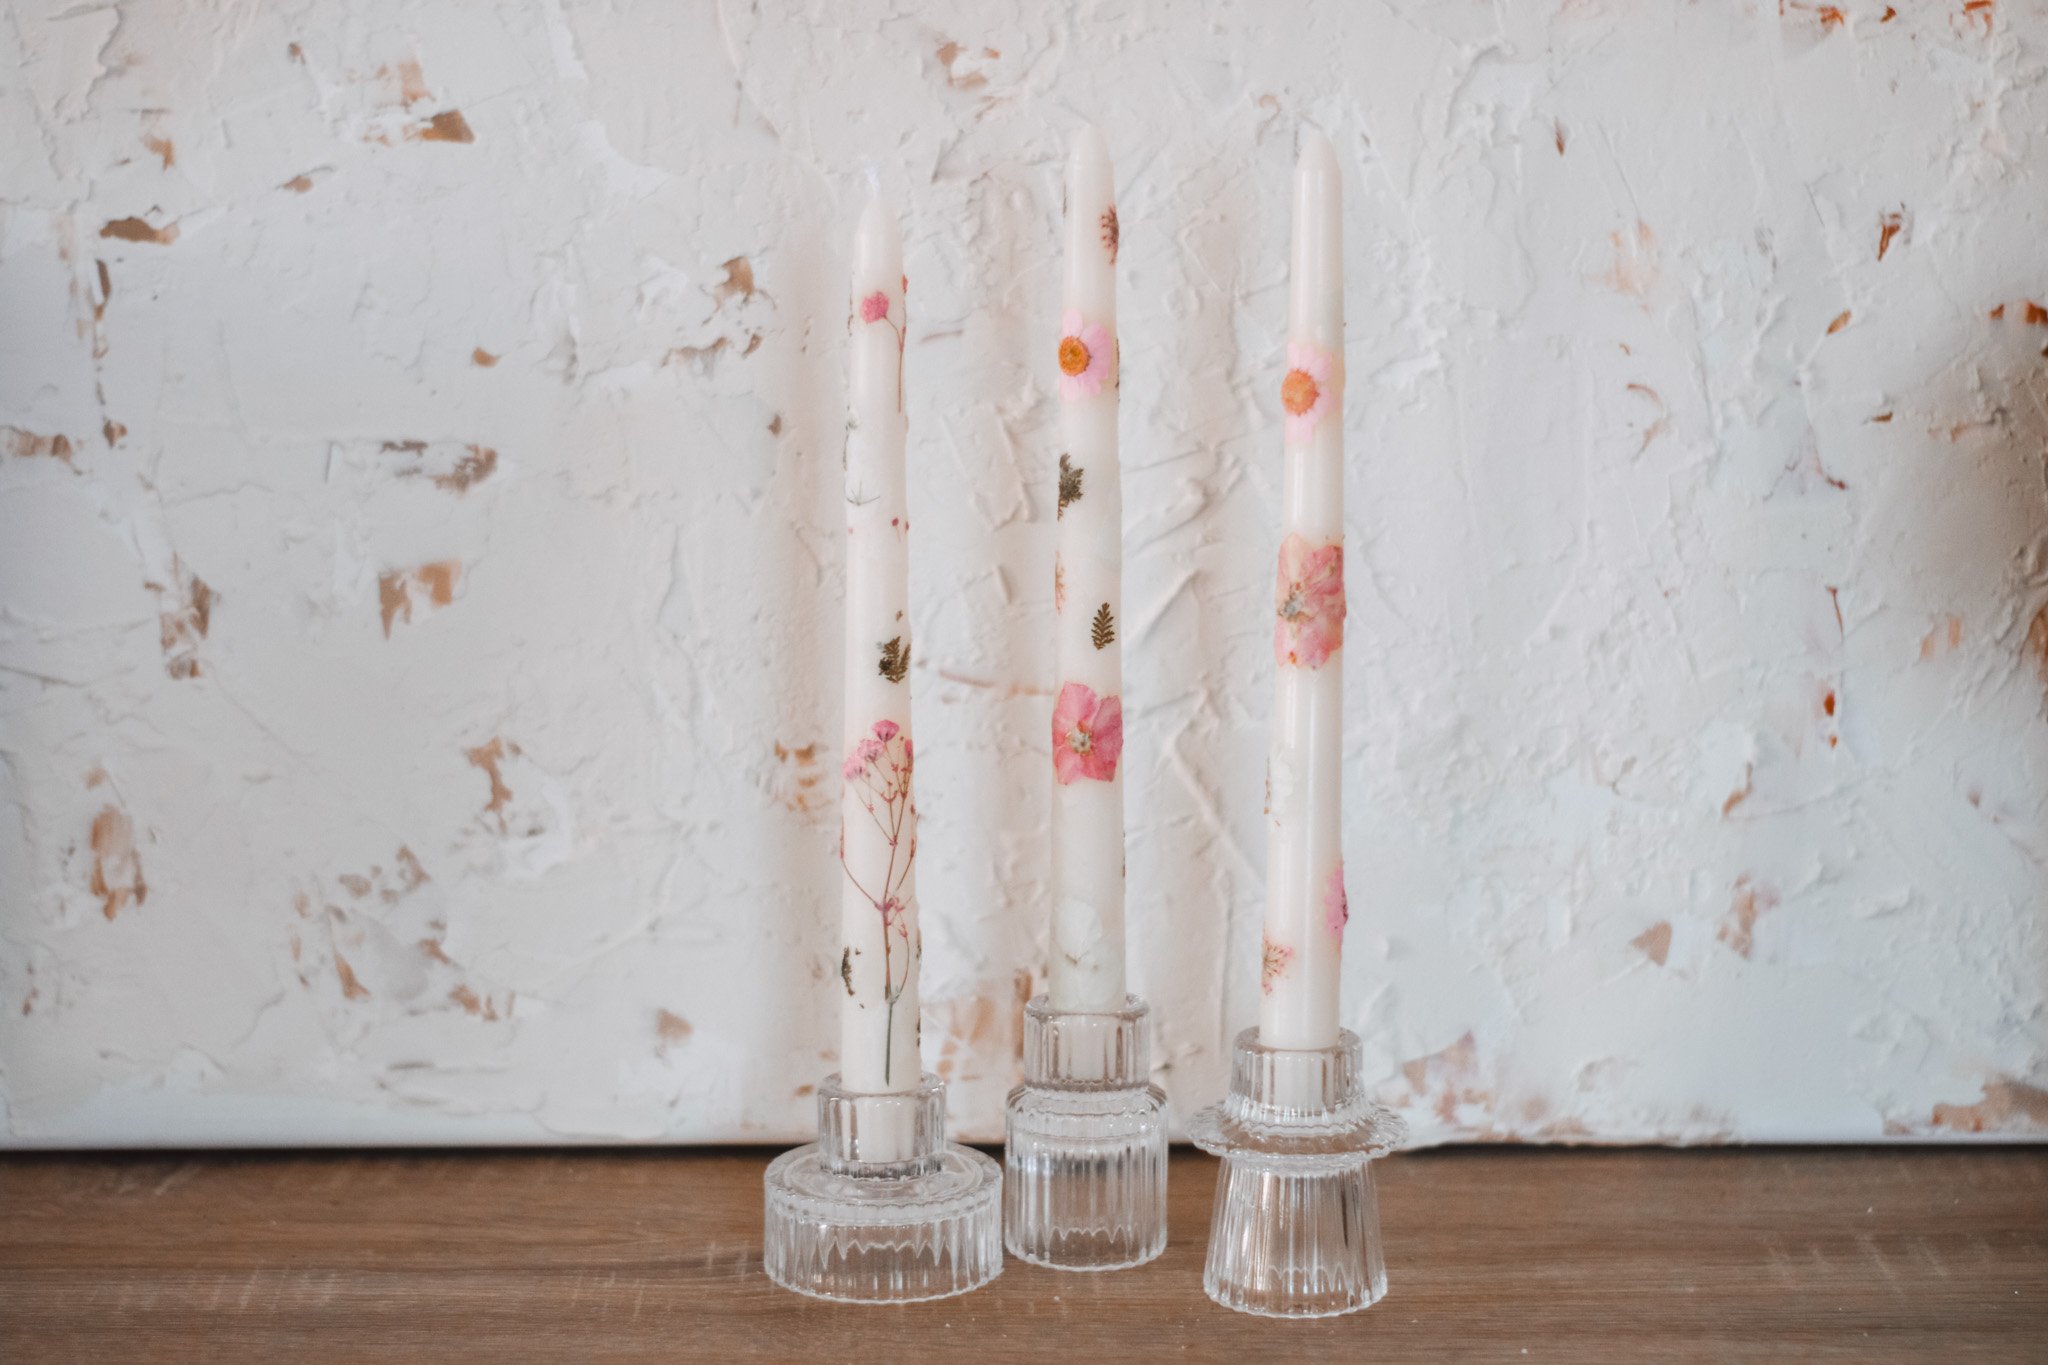
I had seen several different DIY projects involving sprucing up taper candles, but I wanted to do something a bit more floral forward for spring. So I decided to look up how to adhere press flowers to taper candles. It’s really as simple as just painting them on with melted wax or heating up a knife and pressing against the flowers to the candle!
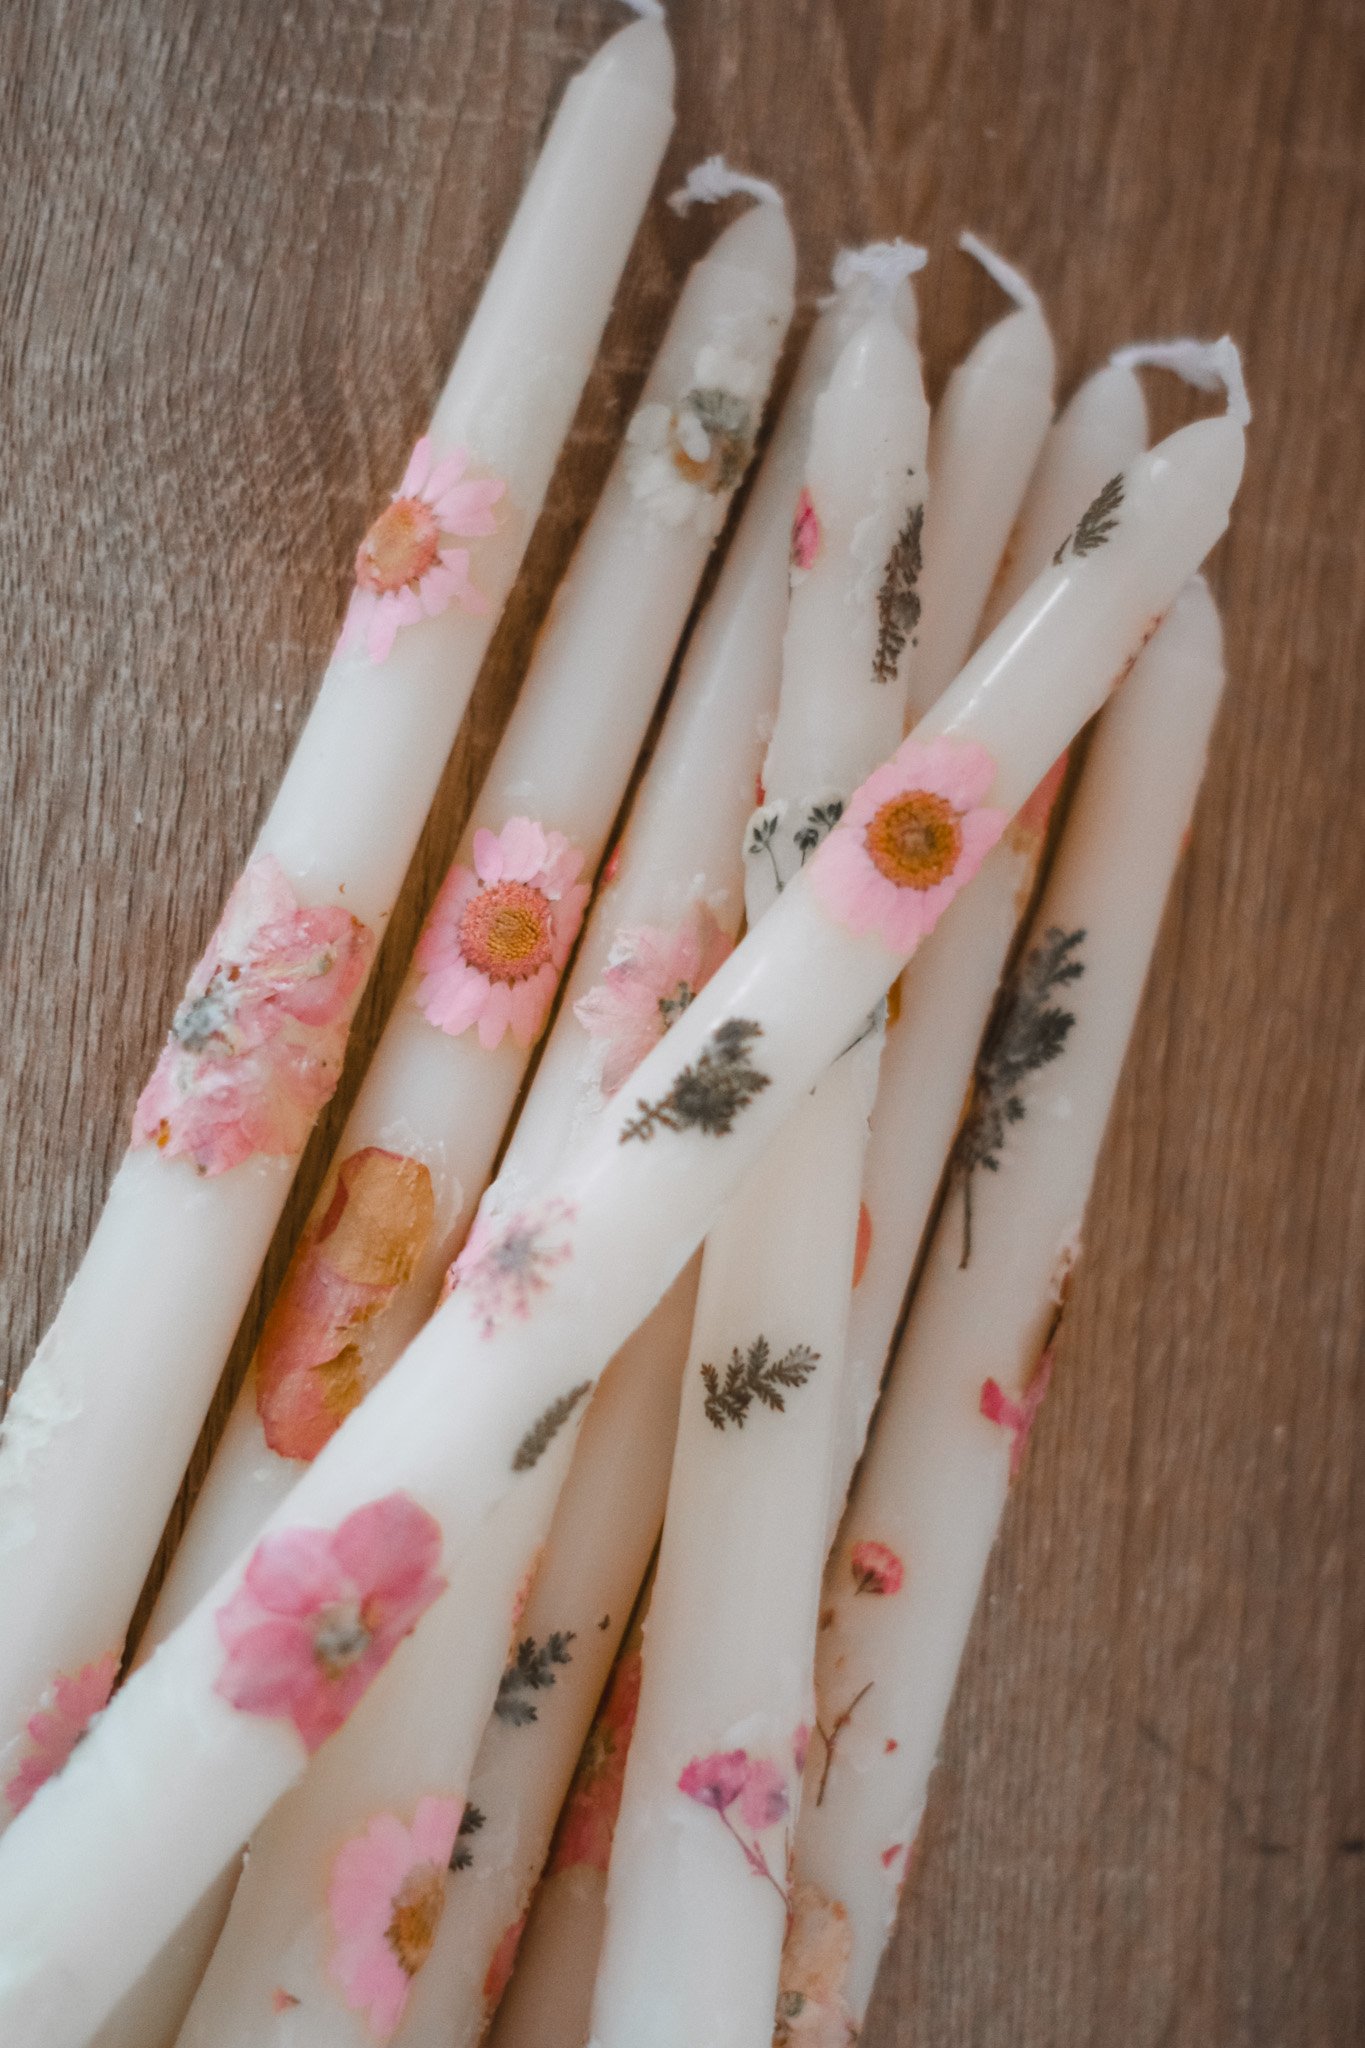
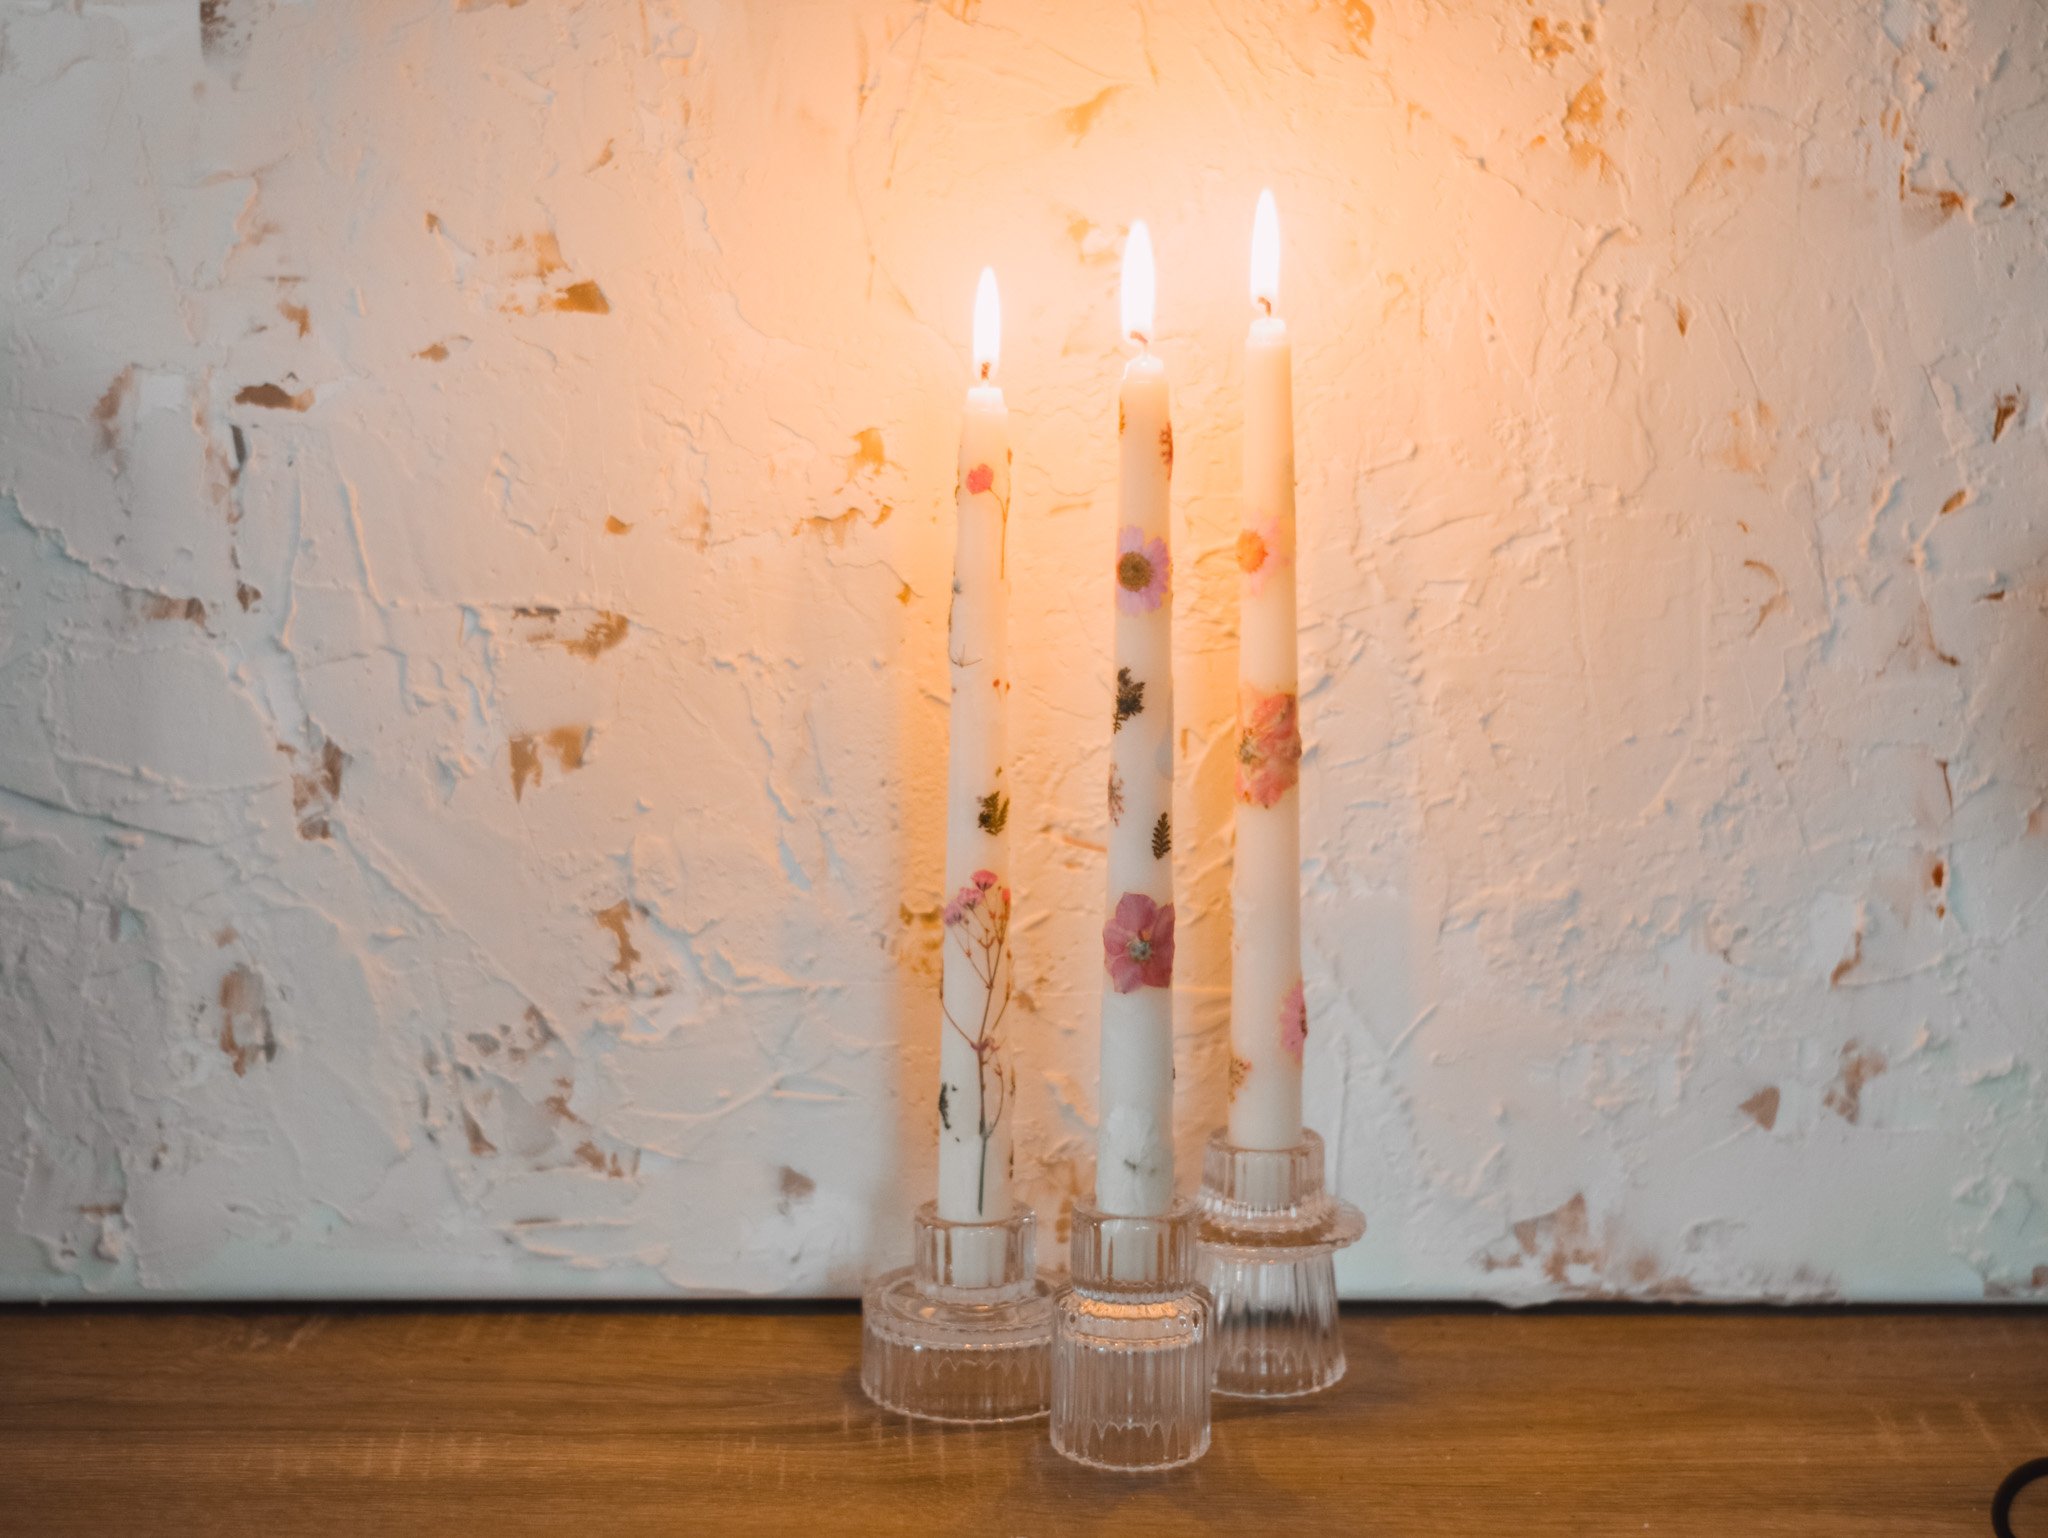
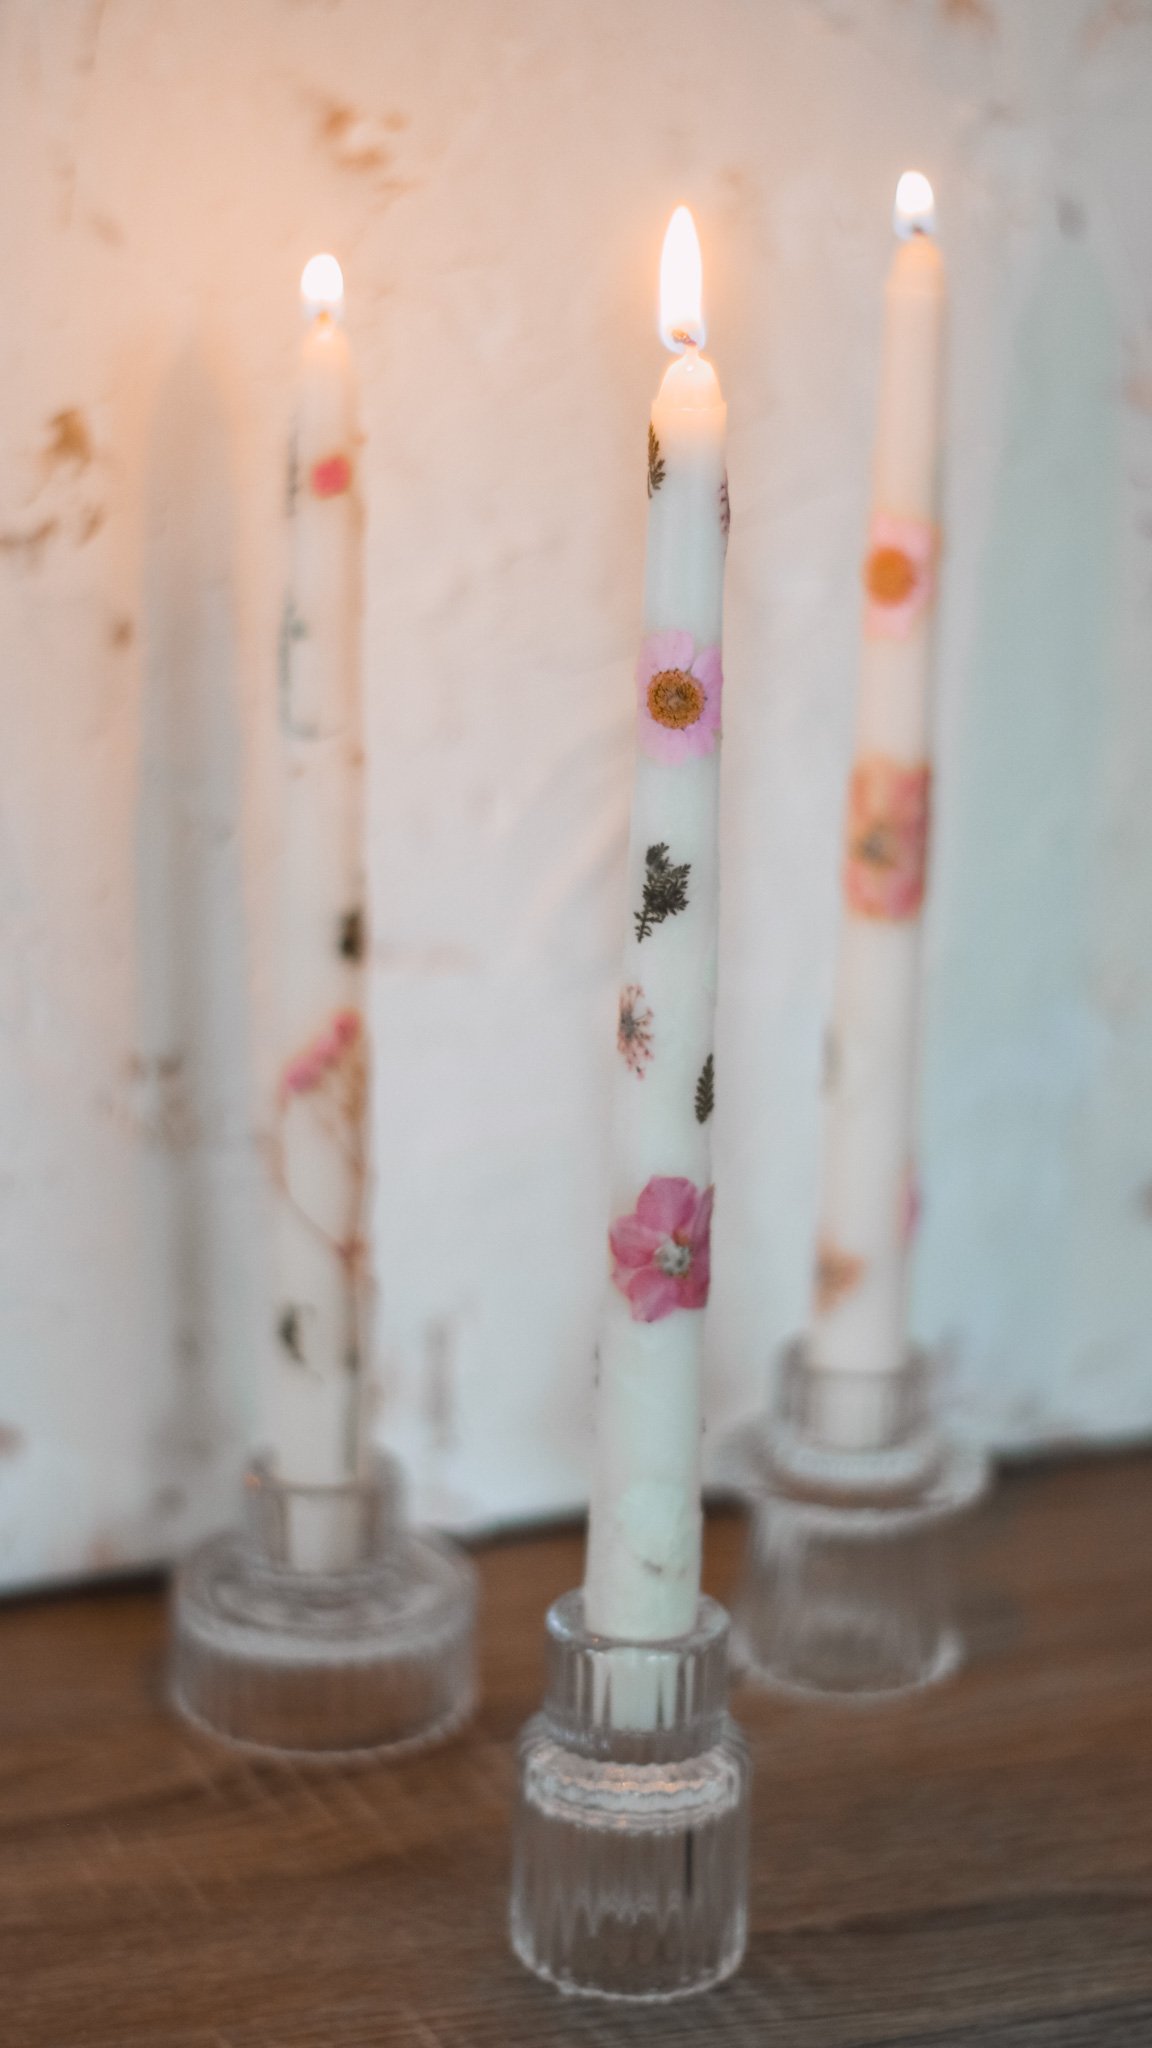
I also tested burning these candles, and really, to be on the safe side should just be used as decorative pieces, but found that if the flowers were really small and very delicate/thin petals then the candle would burn through the flowers more evenly. Again, probably your best bet, and safest route is to use as just decor items - seeing that dried flowers and such have been considered fire hazards (from this NCA report, but seemed to be more if there are larger pieces of flowers) so BURN AT YOUR OWN RISK. Another option is to place just 1-2 pressed flowers towards the base of the taper candle so it’s towards the end of the entire candle (like this one) - I don’t know how it will burn but I figure if it’s towards the end of the candle and near the based of the candle holder the pieces of the flowers will just melt more into the bottom of what’s left of the candle (but that is speculation, not from experience).

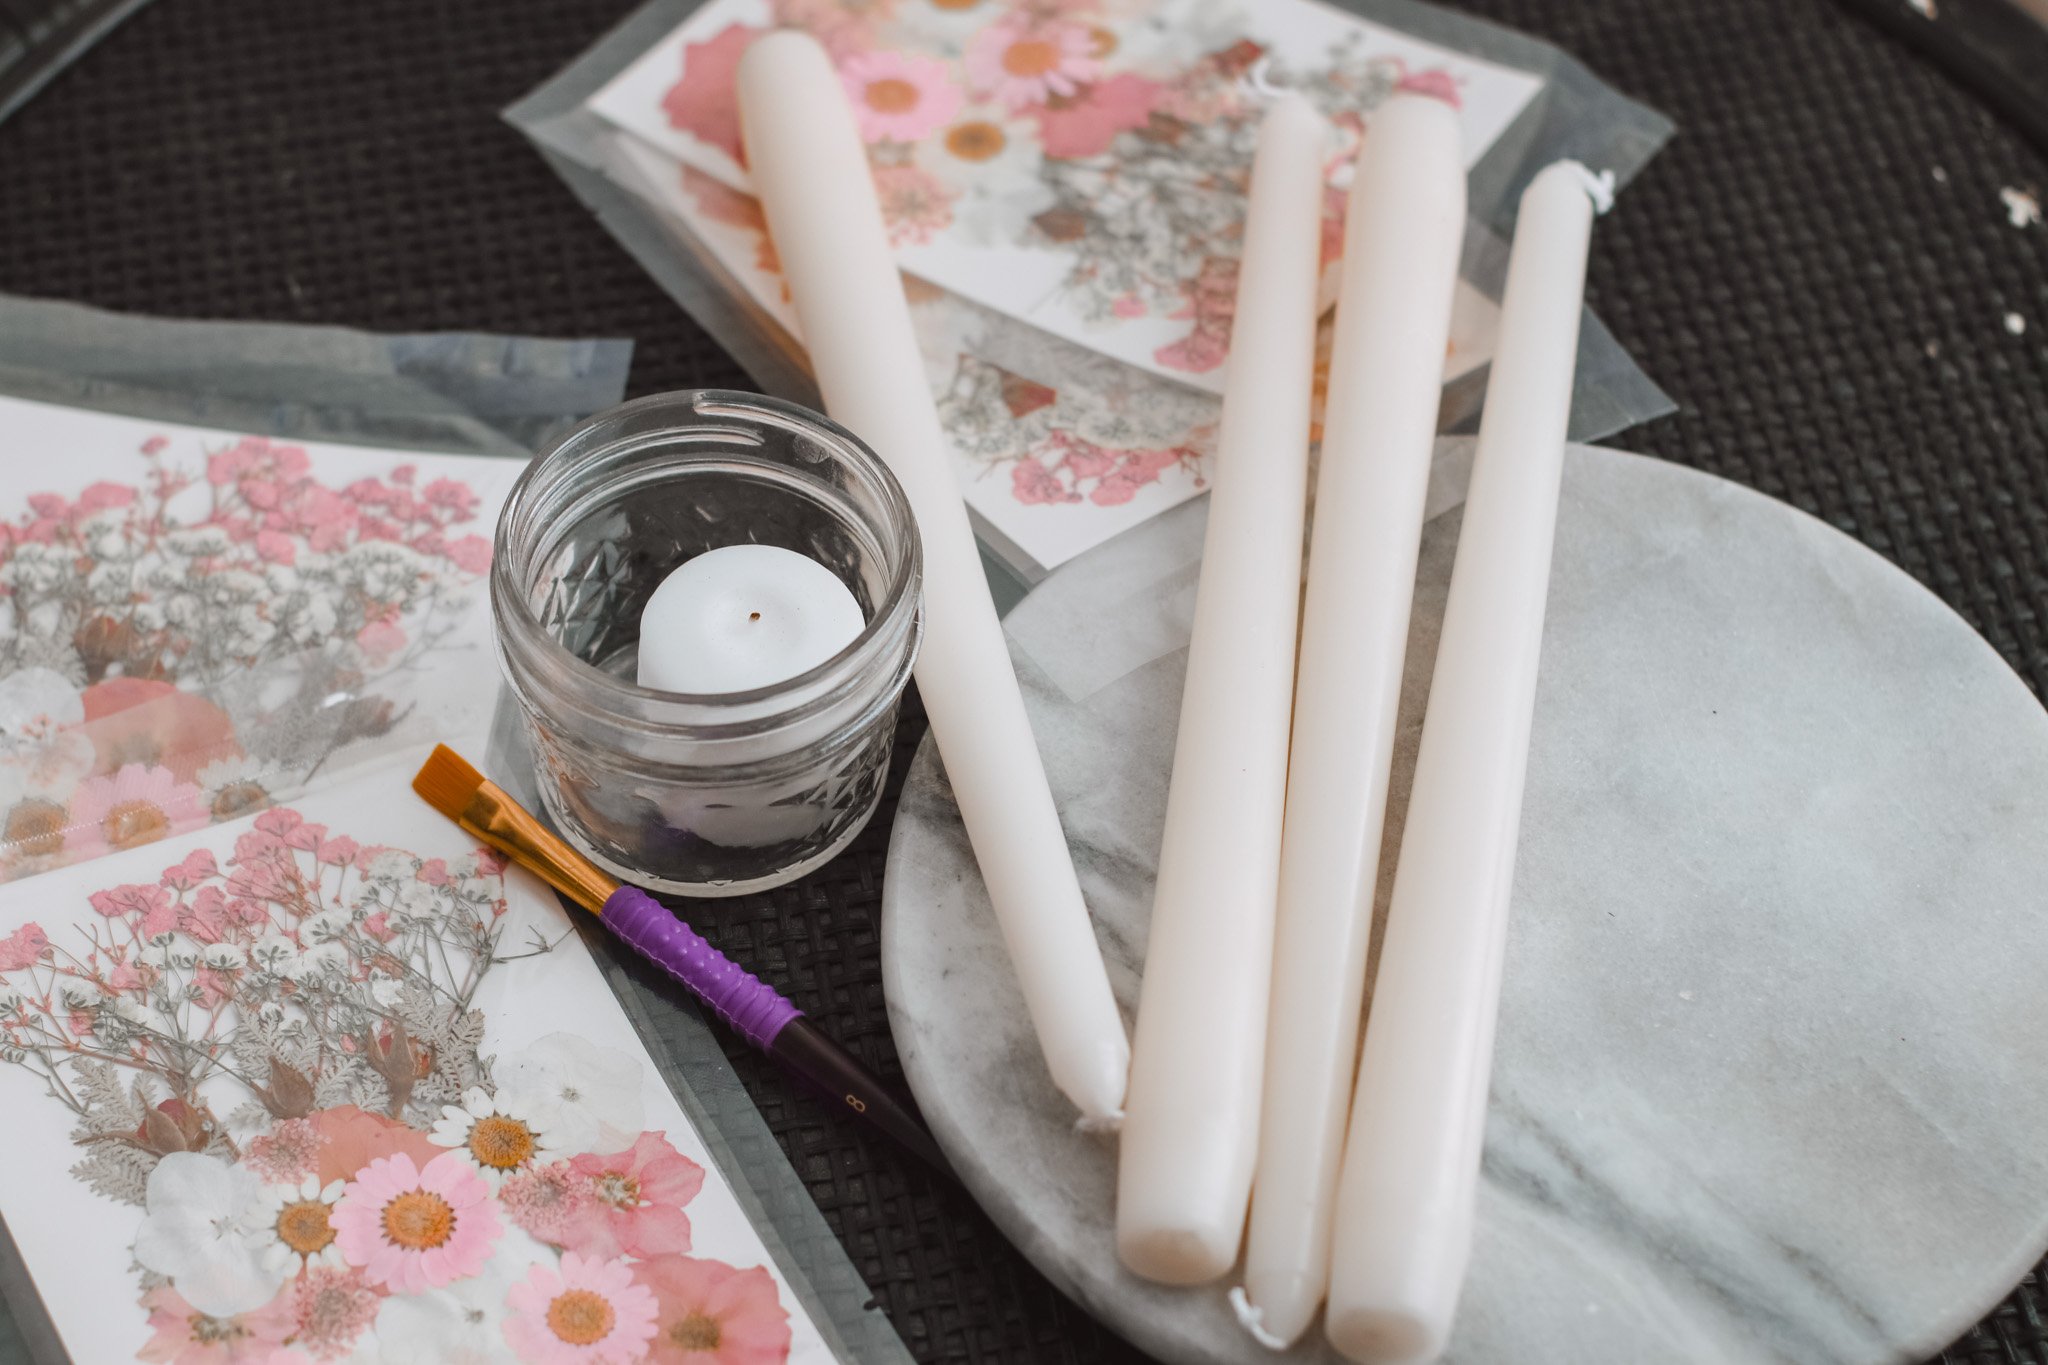
Overall, I just really loved how they turned out because I was a bit skeptical during the process of it. All you need are the following items (which can be found in my amazon shop):
Tealights
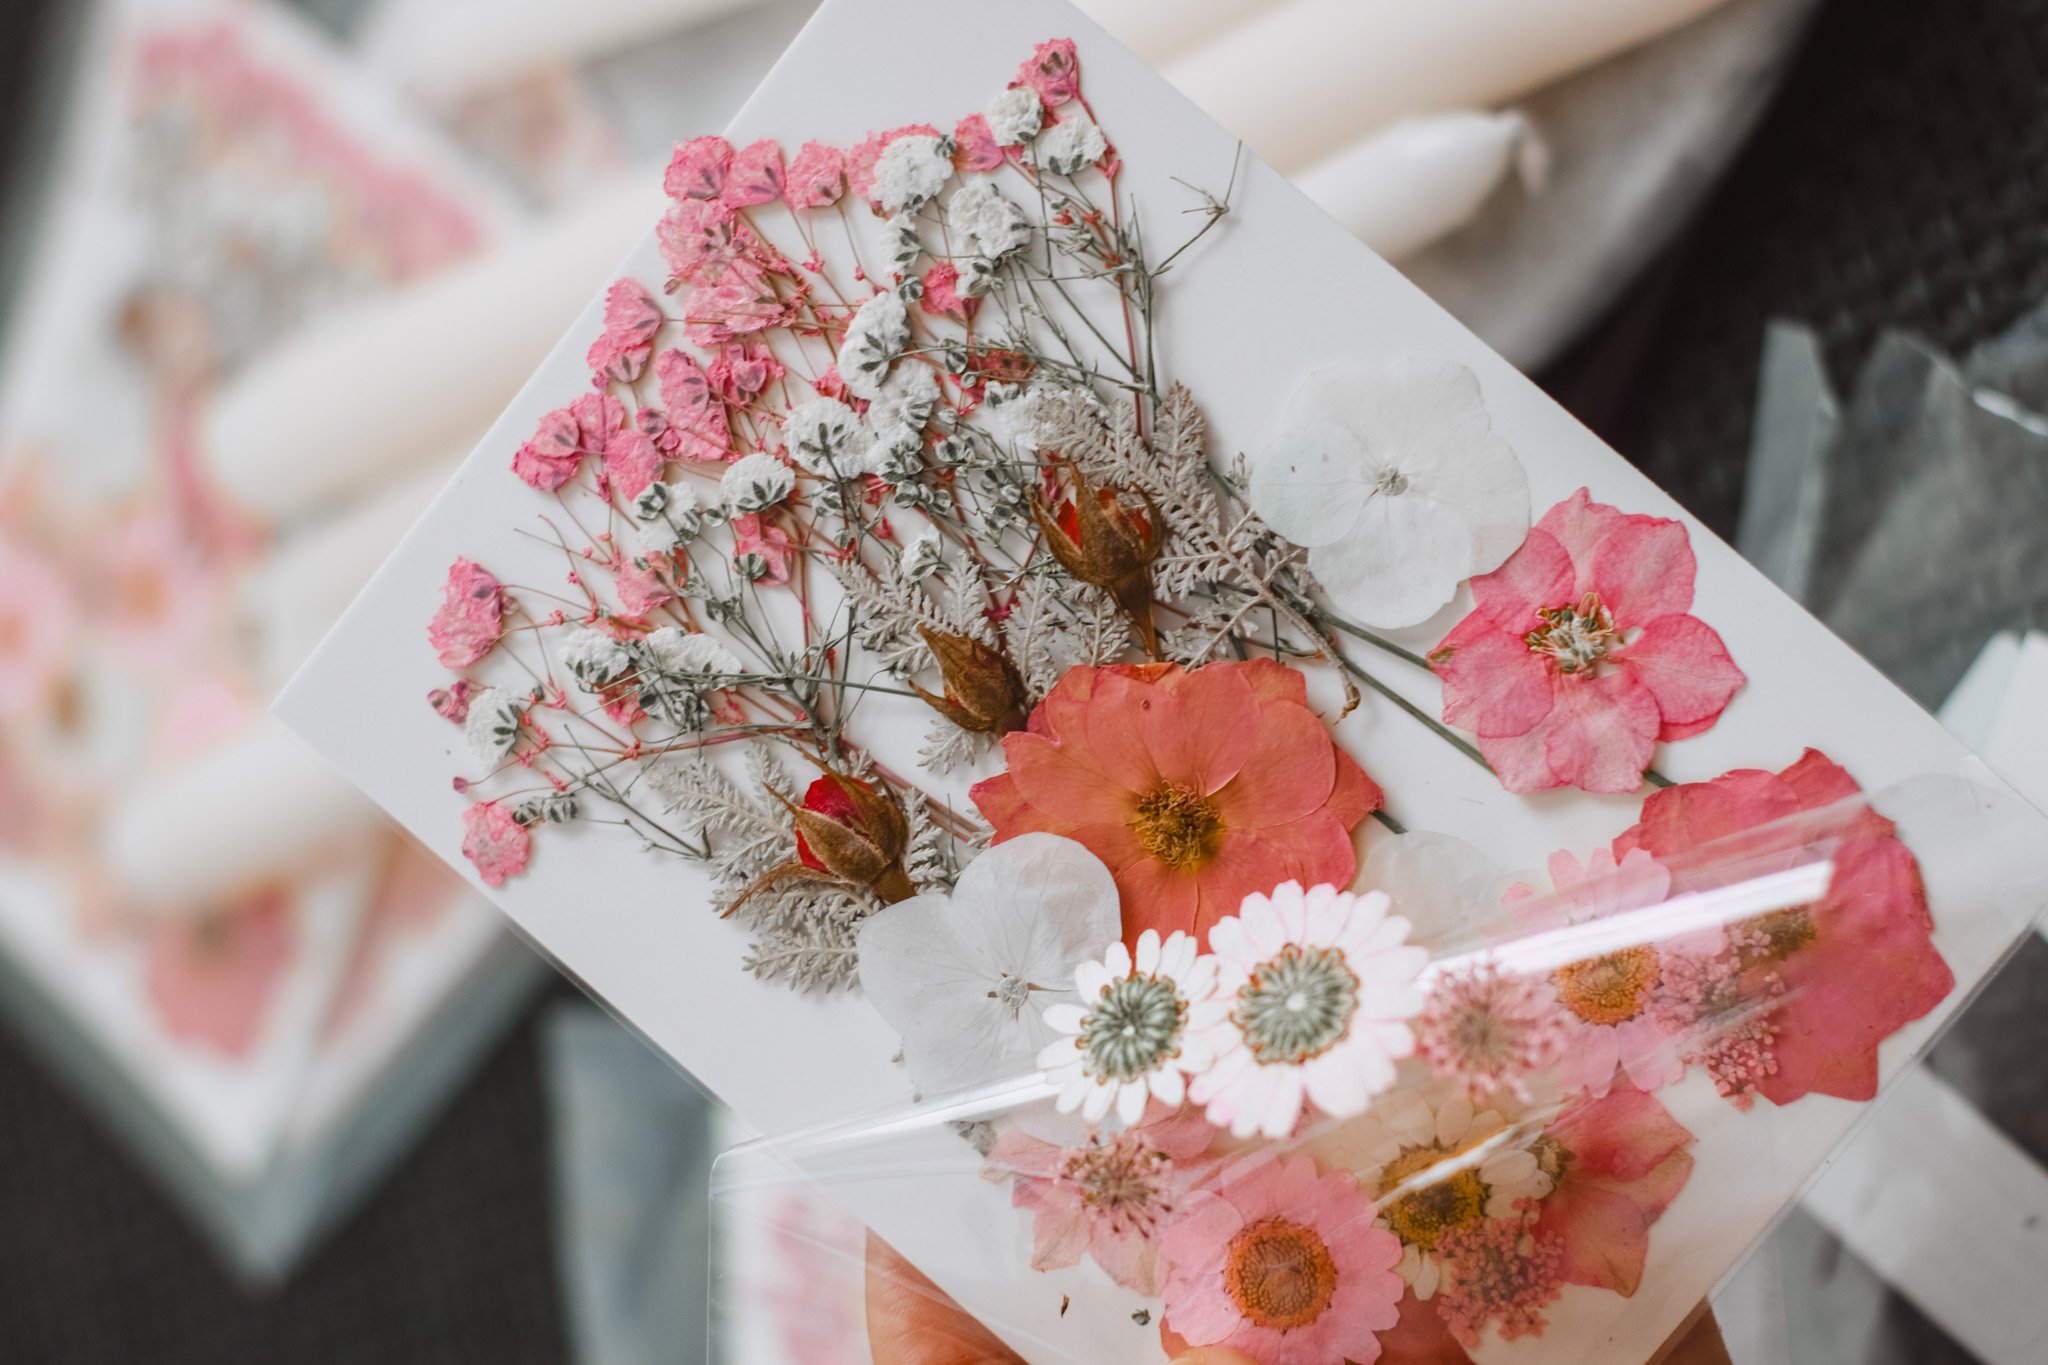
Pressed Flowers (Purchase or Press Yourself)
Taper Candles
Small Paint Brushes or Knife for this tutorial here
These are the candle holders I used to display
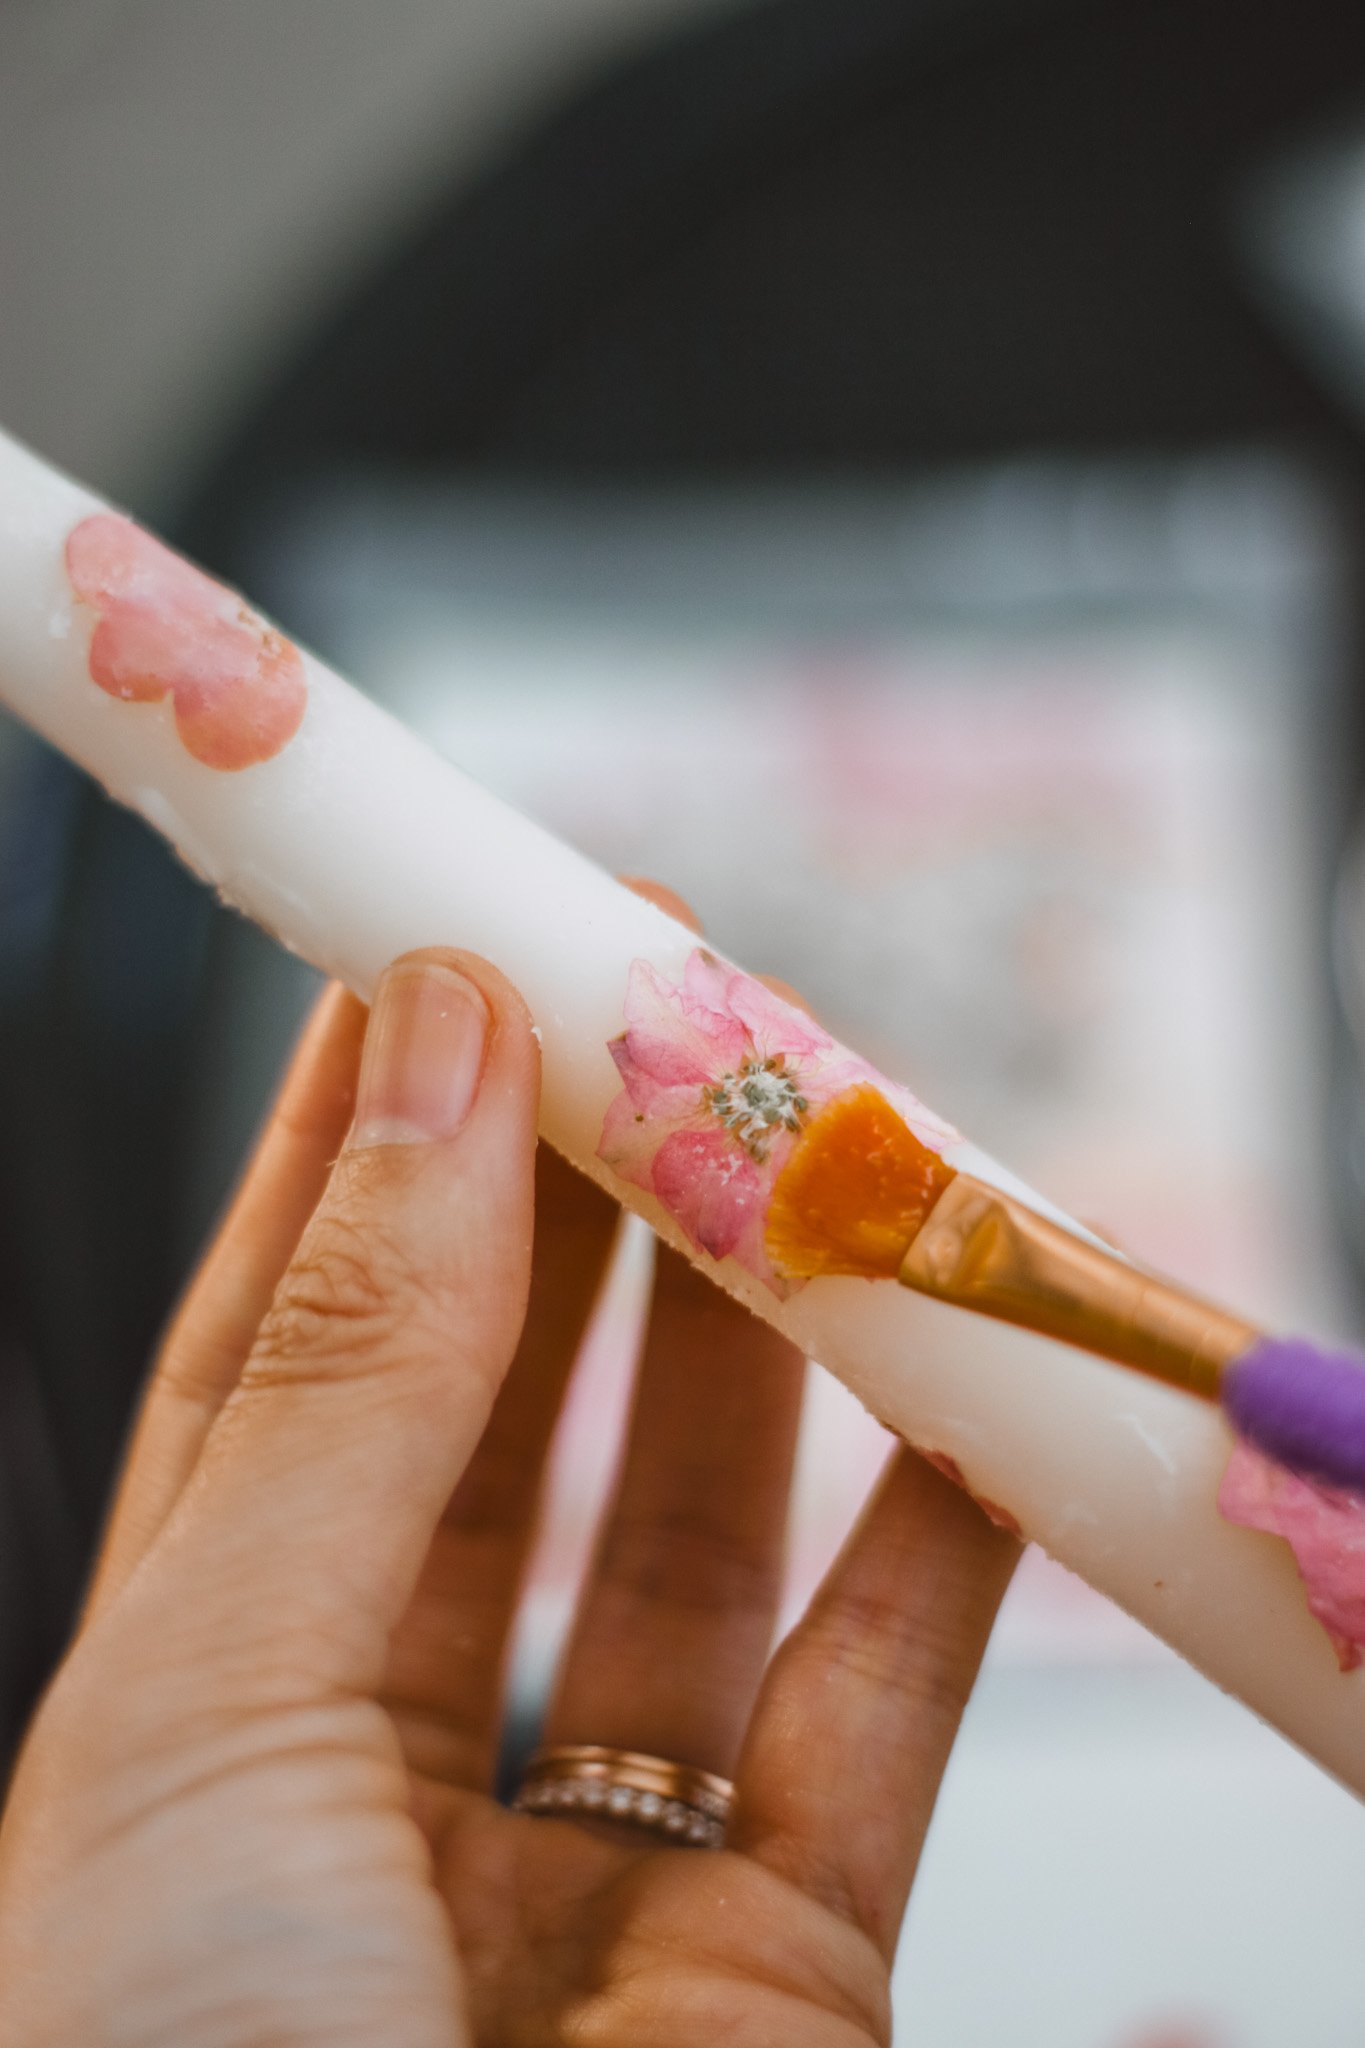
Now, just light a tealight and dip your brush into the melted wax and brush it over the flower onto the taper candle. Some tips:
You may need to adjust pressure dependent on the flower type you are working with, but the thinner and smaller flowers will typically be much easier to work with.
You’ll also need to work quickly because the wax dries quickly, so I think that’s why I was skeptical at the beginning that these would look okay, because I was having trouble finding the right pressure to brush on the wax, the best flowers to use, and the right speed. I finally found more of a stride by third candle, but they all ended up turning out looking okay.
Because of point #2, wax may start to clump up on your brush, so hold your brush up a safe distance from the flame and you’ll see the max start to melt and you can use the melted wax left on the brush bristles to apply more flowers (hold the brush too close and you’ll burn the bristles)
May be help to add a dab of melted wax on the candle where you plan to place the flower, but I found this difficult to do while holding the candle, flower and brush since the small dab of wax would dry so quickly